The West African Examinations Council, WAEC has released the Nov/Dec 2014 waec gce timetable. The West African Senior School Certificate Examination (WASSCE) is scheduled to start by 28th of August 2014 and ends on the 6th of October 2014.
Waec Gce Time Table 2014: Complete 2014/2015 Waec Gce TimeTable
The West African Examinations Council, WAEC has released the Nov/Dec 2014 waec gce timetable. The West African Senior School Certificate Examination (WASSCE) is scheduled to start by 28th of August 2014 and ends on the 6th of October 2014.
A bunch of super useful websites.
A bunch of super useful websites.
Below is List of Most useful site for every one
4 Easy Ways To Fix Smelly Towels
You’re clean when you use your towels. You clean the towels regularly. So why do they smell funky? It has to do with detergent residue and such, but the important question is how you get rid of it! Wikihow.com has a great post detailing 4 different but all easy ways to get your towels smelling fresh and clean. To check them out, simply click the link below:
Science experiment : Make your milk come alive - Awesome milk trick!
We’re immediately trying this at home. All you need to recreate this awesome experiment is milk, food colouring and a drop of dish soap.
Nokia Lumia 8.1 cyan update

LATEST SOFTWARE UPDATE
Latest software release for Nokia Lumia 925 is Lumia Cyan (3051.50009.1424.00xx)
The availability of this update may depend on your network service provider. To check for updates, on your phone, tap Settings > phone update.
The availability of this update may depend on your network service provider. To check for updates, on your phone, tap Settings > phone update.
- Start screen enhancements: add a 3rd column of Live Tiles, and use your favorite photo as a custom tile background
- Action center: swipe down from the top of the screen to see notifications, and customise the quick actions to access important settings easily
- Treats for you: set ringtone and media volume separately, swipe down to close apps in the App Switcher, and glide your finger on the Word Flow keyboard for faster typing
- Update your Nokia Storyteller, Creative Studio, and Nokia Camera apps to get great new features. Available from the Store app.
- The enhanced Store app supports automatic updates, and the new Internet Explorer 11 comes with a reading view and other improvements
- Improvements to stability and performance
HOW TO UPDATE SOFTWARE
Many issues could be resolved just by updating your phone software, and you can get fresh new features and improved performance too. Your phone supports wireless Over the Air (OTA) updates and there is no need for cables or computer, just download and install the update using your phone. Also, your settings, apps, photos, and text messages remain safe and sound.
Step 1. Your phone notifies you when an update is available for you. You can also check for updates, just tap
Settings > Phone Update.
Tip! Use a Wi-Fi network to download the update and avoid mobile data transmission costs. Before starting the update, connect to a charger or make sure your phone has enough battery power (at least 50%). You might also need to make enough space on your phone for the update (1.5GB free phone memory is recommended). To check for available free space, go to Settings > storage sense (storage check).
Step 2. To view and to install the updates, tap the notification message, and follow the instructions shown on your phone. You can install the update immediately, or postpone the update to a more convenient time.
Step 3. The update should take around 15-30 minutes, but a major update could take up to 2 hours to complete depending on your phone model. You are not able to use your phone during the update installation. Follow all the update prompts, and do not worry if your phone restarts several times during the process, that is completely normal.
Additional app updates from the Store could be needed to fully enable new features for your phone. You will get the app update notification on the Store app shortly after the software update.
for more detail http://www.nokia.com/in-en/windows-phone-cyan-update/?dcmpid=omc-smc-facebook.cyanupdate-So
How much sleep do you actually need to work productively?

We all spend about 24 years of our lives sleeping, and although the exact function of sleep is still being debated by science, one or two sleepless nights are enough to make us feel groggy and anxious.
But how many hours of shuteye do we need really every night to make sure we always feel refreshed?
According to the latest episode of AsapSCIENCE, scientists monitored the sleeping habits of three groups of volunteers. One group slept four hours every night for 14 days; the second got six hours of rest, and the third, eight.
After only a couple of weeks, the volunteers in the six-hour group exhibited reaction times similar to those of people who have a blood alcohol level of 0.1 percent, as well as a steady decline in their brain function. Some of them even dozed off during the study’s assessment session.
If you only get four to six hours of sleep a day, could a few night of good sleep help you feel better? Discover the answer in the latest episode of AsapSCIENCE.
Source: AsapSCIENCE
On Your Side: Samsung cell phone fire

A 13-year-old North Texas girl was awoken in the night by a smoldering cell phone on the other side of her pillow, but the cell phone manufacturer says she did something they warn users about.
A spokesperson for Samsung says their products are safe, and pointed out that the battery inside the phone was a replacement unit and not an original Samsung part.
the company does agree there is a need for consumer education when it comes to rechargeable batteries. That’s exactly why they post a warning in their user guide, which specifically states covering one of their devices with bedding or other material could restrict airflow and cause a fire.
Don't let this be you! Read the full story here --- --->
http://
image source : .myfoxhouston.com
ATM Frauds and Solutions

ATM FRAUDS In general ATM fraud can include any deliberate 'criminal' technique which involves the use of an ATM to obtain something of value. Attacks against ATMs may be classified as ATM physical attacks and ATM fraud.
Growing ATM Threats
- • More than 70 percent of financial institutions experienced an increase in ATM/debit card fraud claims in 2011
• The U.S. Secret Service reports $8.5B in annual U.S. credit card fraud losses, including ATM skimming.
• Ram raids are those threats when criminals physically break out ATMs from the wall at the institution.
• Criminals go through the financial institution's telephone banking service to change PIN numbers..
Types of ATM Frauds
- • Card Theft
- • PIN Compromise
- • Card Skimming
- • Cash Trapping
- • Transaction Reversal
- • Deposit Fraud.
What is ATM Skimming
- • ATM skimming Device card reader which can be disguised to look like a part of the machine. The card reader saves the users' card number and pin code, which is then replicated into a counterfeit copy for theft.
- • It help criminials in
- a) Knowing Account information
- b) Pin compromise
- • ATM card entry slot skimmers have various shapes and sizes
How PIN is Compromised
- • Its obtaining debit card information by unauthorized individual.
- • Shoulder surfing or using use of a miniature camera.
- • Video surveillance
- • Hidden video camera
- • Overhead cell phone camera
- • Remotely positioned cameras
- • PIN pad overlay
ATM System Attacks
- • Criminal attempts to penetrate ATM network, violate confidentiality, integrity, and/or authenticity of transaction data.
- • Malicious software (i.e., viruses, worms, Trojans, rootkits, etc.) installed on ATM’s computer systems
How to avoid ATM Frauds
• Fraud Prevetion
• Physical Protection
• System Security
• Intellegent Monitoring
• Consultancy
• Consumer Safety
Fraud Prevetnion
• Shield your hand when you enter in your PIN
• Ensure that no one is peeking or shoulder surfing while you are entering PIN.
• Avoid using ATMs in isolated locations
• Always prefer ATM machines near Bank Branch.
ATM Skimming • Never follow a link in a bank email notice if you find it suspicious. visit your banks website and search for latest updates.
ATM Skimming • Never follow a link in a bank email notice if you find it suspicious. visit your banks website and search for latest updates.
• Examine the ATM equipment carefully for any skimming devices. • Look for 'extra' cameras other than general ATM security camera.
• Check the ATM card Slot properly before using it.
NEVER EVER RELY ON UNKNOWN PERSON
• Use of Up-to-date Technology
• Security CCTV Cameras
• Alarm Clock
• Safe and locks
• Video monitors in junction with sensors.
• Ensuring Best Location for ATM deployment. . Physical Protection of ATM for Owners
• Very high security level
• Alarm System
• Branded and Top Quality Machines
• Latest Software and Technology
• Enhanced Card Reader Slots Choose an ATM Service Provider which gives
CONCLUSIONS
• Choose your ATM machines carefully
• Prefer ATMs near Bank • Don´t let anyone distract or assist you
• Cancel your card immediately if it is lost • Check the card slot carefully
• Ensure that there are no hidden cameras
THANK YOU
Top 10 Facts You Didn’t Know About Automated Teller Machines (ATM)
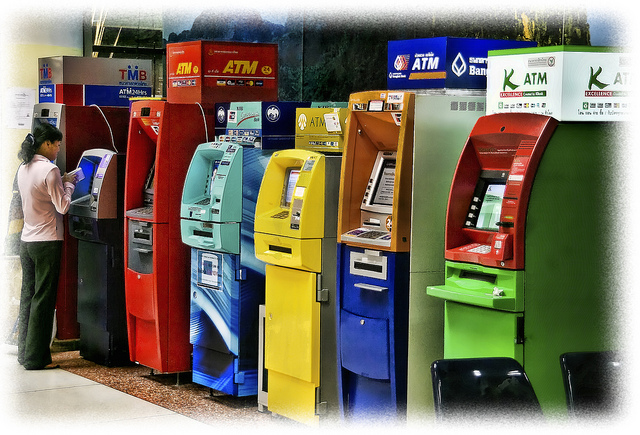
How many of these fun facts did you know about automated bank teller machines (or ATMs, for short)?
1. Believe it or not, the first cash dispensing machine was invented by Luther George Simjian way back in 1939. The mechanical dispenser was installed in New York City at the City Bank of New York but was removed after only six months due to lack of customer acceptance.
2. Simjian later lamented that, “the only people using the machines were a small number of prostitutes and gamblers who didn’t want to deal with tellers face to face.”
3. Simjian had another invention that was much more successful during that era: a simulator that could be used to train aviators in identifying types of aircraft and determining their distance and speed. During World War II, the U.S. Navy bought more than 2000 of them from Simjian. The number of ATMs he sold during that same period: 0.
4. The first modern electronic ATM was installed in Enfield Town in North London, United Kingdom in 1967 by Barclays Bank. Instead of cash, though, the ATM dispensed vouchers.
5. The first free standing electronic ATM was installed in 1969 by Chemical Bank at its branch in Rockville Centre, New York. This device was the first machine to use the magnetic stripe on plastic cards.
6. ATMs didn’t begin to proliferate until 1973, when 2,000 of the machines were sold and distributed across the United States. Not everybody was happy; bankers at the time were concerned about the machine’s price tag: $145,000 (in 2009 dollars). Today an ATM can be bought for under $3000.
7. Sixty percent of Americans ages 25-34 and 51% ages 25-49 use ATM machines eight times per month, withdrawing an average of $55.00 per transaction.
8. TGIF: The most popular day for ATM use is Friday. On a related note, night clubs with ATMs end up keeping 70-80% of the money dispensed from their cash machines.
9. The United States currently has more ATMs than any other country — but their numbers are dropping. The Boston Globe reports that after peaking at 396,000 in 2005, the number of US-based ATMs fell to 360,659 in 2007.
10. Japan has more ATMs than any other country on a per capita basis. The next four countries in order: Spain, South Korea, the United States, and Canada.
VIDEO: Does Size Really Matter? Science Answers.
Sup Travellers?! Since the dawn of time the debate about penis size has been ongoing and up to this day not many have been able to answer the very simple question "does size matter?"
 Sure some ladies may say that it doesn't matter but words are just
words. In order to find out the world's most daunting question ASAP
Science went down to the nitty gritty of the question and answered it
backed up by science. Check out the 3 minute video above if you haven't
already for the "answer". Anyway, my name is Trinikid and you've just
been informed.

Man single-handedly grows a forest larger than Central Park
Since 1979, forestry worker Jadav Payeng has been cultivating a forest in northeast India that now spans 550 hectares.

Image: William Douglas McMaster
Home to a population of 150,000 residents, Majuli Island in northeast India is the largest river island on Earth. But due to the effects of erosion over the past hundred years, it's been shrinking, as strong winds sweep the soil and sand away and into the surrounding river water. The island's total area of 1,250 square kilometres has been reduced to less than half, and as of 2001, it covered just 421.65 square kilometres.
One resident has decided to do something to stem the erosion of Majuli Island. Since 1979, forestry worker Jadav Payeng has dedicated his life to fortifying the island by building a forest on one of its sandbars, tree by tree. Trees are crucial for keeping the effects of erosion at bay because not only do their roots hold the soil together, preventing it from shifting away, but they also act as windbreakers, slowing the wind down so it’s less likely to blow both soil and sand away.
Now, over three decades later, Payeng’s forest covers 550 hectares. This mean this one man’s forest is now larger than New York’s Central Park - which is just 341 hectares by comparison.
Named the Molai Forest, it is so rich and dense, large populations of wildlife, including several endangered species, have moved in. “One hundred and fifteen elephants live there for three months every year,” says Payeng in a documentary about him called Forest Man, released by Canadian filmmaker William Douglas McMaster last year. "In my forest there are also rhinos, deer, and many tigers. After 40 years, we have also seen vultures return to the area.”
Molai Forest also includes many plant species, including arjun (Terminalia arjuna), ejar(Lagerstroemia speciosa), goldmohur (Delonix regia), koroi (Albizia procera), and moj (Archidendron bigeminum), plus 300 hectares of bamboo.
You can watch McMaster's really beautiful documentary about Payeng and his photographer friend, Jitu Kalita, below:
Sources: Colossal, Gizmodo

How Instant Ramen Noodles Are Made?

But are you ready to learn how these peculiar noodles are made?
In this short from Potluck Video, a crew travels to Sun Noodles in New Jersey to learn the magic that goes into making this starchy snack.
The process might not be what you expect. (And it's far different from the traditional technique of making ramen noodles by hand.)
How to Block SBI ATM card through sms
You can now Block your SBI ATM cum Debit Card through SMS, in case your card is lost or stolen. Follow these simple steps to immediately block your card:
To contact SBI Credit Cards
Sms BLOCK XXXX (Last 4 digits of your card number) to 5676791 from your registered mobile number.
You can get last 4 digits of your card number from any of your previous card statements.
From BSNL / MTNL Lines - 1800 180 1290 or 1860-180-1290 From all other phones - 39 02 02 02
Sms BLOCK XXXX (Last 4 digits of your card number) to 5676791 from your registered mobile number.
You can get last 4 digits of your card number from any of your previous card statements.
From BSNL / MTNL Lines - 1800 180 1290 or 1860-180-1290 From all other phones - 39 02 02 02
How to block sbi atm card online
Block SBI ATM Card
You can now Block your SBI ATM cum Debit Card through OnlineSBI, in case your card is lost or stolen. Follow these simple steps to immediately block your card:

how to transfer funds from icici atm to any account number
With ICICI ATM you can now transfer your funds to any dear ones with ease. Check out the video which explains how to transfer funds from ICICI ATM to Any Account number
If you transfer to any other ICICI account it will transfer instantly
You can also transfer to your funds to ICICI Registered Payee whom you added via your online ICICI Banking account
SBI ATM to ATM Money Transfer process
State Bank of India (SBI) is the state-owned largest banking and financial services company in India by revenue, assets and market capitalization. SBI is also known as “Banker to every Indian”. SBI provides State Bank ATM-cum-Debit Card facility through which an SBI accountholder can withdraw cash or do many stuffs FREE through any of over 26,000 ATMs of State Bank Group within the country. Now you dont need to visit the branch or login to your Online SBI Account to transfer money to the SBI beneficiaries (to whom money is to be transferred). Instead you can use SBI Card to Card Transfer facility provided by SBI.
How to Transfer Money through State Bank ATM
If you require transferring some money from one SBI Account to another SBI Account through State Bank ATM, you can see there is no option to transfer directly to SBI bank account. Instead, you can make use of card to card transfer from SBI ATM. In card to card transfer, the money in your account gets transferred to account number of beneficiary’s debit card number of state bank group. As a result, you can say it that card to card money transfer is the same as transferring money to another bank account..
Steps to Avail Card to Card Money Transfer Facility
To manipulate State Bank card to card fund transfer facility you can follow the following steps:
- Swipe your debit card of State Bank of India (SBI Debit Card).
- Choose Transfer option (from the various option listed on the screen after swiping your ATM card. Transfer option could be seen at the right bottom side of the ATM screen.).
- Enter the PIN (after selecting Transfer option you will be asked to Enter the PIN)
- Choose Card to Card Transfer option (from the various option listed on the screen after entering the PIN.).
- Enter Beneficiary’s Debit Card Number (you have to enter the 19-digit debit card number of the beneficiary to whom the money is to be transferred).
- Enter Again Beneficiary’s Debit Card Number (you will be asked twice to enter the debit card number of the beneficiary for confirmation).
- Enter Transferable Amount (you can now enter the amount of money which you want to transfer to the beneficiary’s account).
- Select account type (you will be asked to choose your account type from either Savings or Checking).
- Transaction Completed (your transaction is completed now and the amount of money is credited instantly to the recipient’s account).
Things you must have for SBI Card to Card Transfer
For availing SBI Debit Card to Debit Card money transfer facility you must have these two:
- your debit card, and
- debit card number of beneficiary (to whom money is to be transferred)
When and Where Card To Card Transfer can be Availed
SBI Card to Card Transfer Limit
A present, limitation for State Bank of India card to card transfer facility is:
- Per transaction limit- You can transfer a maximum of Rs 15,000/- per transaction.
- Per day limit- A maximum of Rs 30,000/- can be transferred per day from one debit card to another.
- Number of transactions limit- An SBI ATM cardholder can do at most to transactions per day for card to card money transfer.
More Info on SBI Transfer Cash
For more information on SBI card to card money transfer facility one can visitofficial website of State Bank of India i.e. www.statebankofindia.com. Alternatively, you can make call SBI customer care toll-free numbers at 1800-425-3800 or 1800-112-211 round the clock for any type of service related confusion or further queries.
Seo tag :
how to transfer money from sbi atm to sbi account
sbi atm to atm money transfer process
sbi atm card to card transfer
sbi atm to atm money transfer limit
can i transfer money through sbi atm
how to transfer money using sbi atm card
money transfer from atm to an account
how can i transfer money from atm
Microsoft Excel shortcut keys -
Excel Shortcut keys
| F2 | Edit the selected cell |
| F5 | Go to a specific cell |
| F7 | Spell check selected text and/or document |
| F11 | Create chart |
| Ctrl + Shift + ; | Enter the current time |
| Ctrl + ; | Enter the current date |
| Alt + Shift + F1 | Insert new worksheet |
| Shift + F3 | Open the Excel formula window |
| Shift + F5 | Bring up search box |
| Ctrl + K | Insert link |
| Ctrl + F | Open find and replace options |
| Ctrl + G | Open go-to options |
| Ctrl + H | Open find and replace options |
| Ctrl + U | Underline highlighted selection |
| Ctrl + Y | Underline selected text |
| Ctrl +5 | Strikethrough highlighted selection |
| Ctrl + O | Open options |
| Ctrl + N | Open new document |
| Ctrl + P | Open print dialog box |
| Ctrl + S | Save |
| Ctrl +Z | Undo last action |
| Ctrl + F9 | Minimize current window |
| Ctrl + F10 | Maximize currently selected window |
| Ctrl + F6 | Switch between open workbooks / windows |
| Ctrl + Page Up & Page Down | Move between Excel worksheets in the same document |
| Ctrl + Tab | Move between two or more open Excel files |
| Alt + = | Create formula to sum all of above cells |
| Ctrl + ' | Insert value of above cell into current cell |
| Ctrl + [ | Decrease selected font -1 |
| Ctrl + Shift + ! | Format number in comma format |
| Ctrl + Shift + $ | Format number in currency format |
| Ctrl + Shift + # | Format number in date format |
| Ctrl + Shift + % | Format number in percentage format |
| Ctrl + Shift + ^ | Format number in scientific format |
| Ctrl + Shift + @ | Format number in time format |
| Ctrl + → | Move to next section of text |
| Ctrl + Space | Select entire column |
| Shift + Space | Select entire row |
| Ctrl + W | Close document |
Keyboard shortcuts for Microsoft Outlook 2014

Outlook Shortcut Keys
| Alt + S | Send the email |
| Ctrl + C | Copy selected text |
| Ctrl + X | Cut Selected text |
| Ctrl + P | Open print dialog box |
| Ctrl + K | Complete name / email typed in address bar |
| Ctrl + B | Bold highlighted selection |
| Ctrl + I | Italicize highlighted selection |
| Ctrl + U | Underline highlighted selection |
| Ctrl + R | Reply to an email |
| Ctrl + F | Forward an email |
| Ctrl + N | Create a new email |
| Ctrl + Shift + A | Create a new appointment to your calendar |
| Ctrl + Shift + O | Open the outbox |
| Ctrl + Shift + I | Open the inbox |
| Ctrl + Shift + K | Add a new task |
| Ctrl + Shift + C | Create a new contact |
| Ctrl + Shift + J | Create a new Journal Entry |
Basic navigation
| TO DO THIS | PRESS |
|---|---|
| Switch to Mail. | Ctrl+1 |
| Switch to Calendar. | Ctrl+2 |
| Switch to Contacts. | Ctrl+3 |
| Switch to Tasks. | Ctrl+4 |
| Switch to Notes. | Ctrl+5 |
| Switch to Folder List in Folder Pane. | Ctrl+6 |
| Switch to Shortcuts. | Ctrl+7 |
| Switch to next message (with message open). | Ctrl+Period |
| Switch to previous message (with message open). | Ctrl+Comma |
| Move between the Folder Pane, the main Outlook window, the Reading Pane, and the To-Do Bar. | Ctrl+Shift+Tab or Shift+Tab |
| Move between the Outlook window, the smaller panes in the Folder Pane, the Reading Pane, and the sections in the To-Do Bar. | Tab |
| Move between the Outlook window, the smaller panes in the Folder Pane, the Reading Pane, and the sections in the To-Do Bar, and show the access keys in the Outlook ribbon. | F6 |
| Move around message header lines in the Folder Pane or an open message. | Ctrl+Tab |
| Move around within the Folder Pane. | Arrow keys |
| Go to a different folder. | Ctrl+Y |
| Go to the Search box. | F3 or Ctrl+E |
| In the Reading Pane, go to the previous message. | Alt+Up Arrow or Ctrl+Comma or Alt+Page Up |
| In the Reading Pane, page down through text. | Spacebar |
| In the Reading Pane, page up through text. | Shift+Spacebar |
| Collapse or expand a group in the email message list. | Left Arrow or Right Arrow, respectively |
| Go back to previous view in main Outlook window. | Alt+B or Alt+Left Arrow |
| Go forward to next view in main Outlook window. | Alt+Right Arrow |
| Select the InfoBar and, if available, show the menu of commands. | Ctrl+Shift+W |
Search
| TO DO THIS | PRESS |
|---|---|
| Find a message or other item. | Ctrl+E |
| Clear the search results. | Esc |
| Expand the search to include All Mail Items, All Calendar Items, or All Contact Items, depending on the module you are in. | Ctrl+Alt+A |
| Use Advanced Find. | Ctrl+Shift+F |
| Create a Search Folder. | Ctrl+Shift+P |
| Search for text within an open item. | F4 |
| Find and replace text, symbols, or some formatting commands. Works in the Reading Pane on an open item. | Ctrl+H |
| Expand search to include items from the current folder. | Ctrl+Alt+K |
| Expand search to include subfolders. | Ctrl+Alt+Z |
Flags
| TO DO THIS | PRESS |
|---|---|
| Open the Flag for Follow Up dialog box to assign a flag. | Ctrl+Shift+G |
Color Categories
| TO DO THIS | PRESS |
|---|---|
| Delete the selected category from the list in the Color Categories dialog box. | Alt+D |
Create an item or file
| TO DO THIS | PRESS |
|---|---|
| Create an appointment. | Ctrl+Shift+A |
| Create a contact. | Ctrl+Shift+C |
| Create a contact group. | Ctrl+Shift+L |
| Create a fax. | Ctrl+Shift+X |
| Create a folder. | Ctrl+Shift+E |
| Create a meeting request. | Ctrl+Shift+Q |
| Create a message. | Ctrl+Shift+M |
| Create a note. | Ctrl+Shift+N |
| Create a Microsoft Office document. | Ctrl+Shift+H |
| Post to this folder. | Ctrl+Shift+S |
| Post a reply in this folder. | Ctrl+T |
| Create a Search Folder. | Ctrl+Shift+P |
| Create a task. | Ctrl+Shift+K |
| Create a task request. | Ctrl+Shift+U |
Command commands in most items
| TO DO THIS | PRESS |
|---|---|
| Save (except in Tasks). | Ctrl+S or Shift+F12 |
| Save and close (except in Mail). | Alt+S |
| Save as (only in Mail). | F12 |
| Undo. | Ctrl+Z or Alt+Backspace |
| Delete an item. | Ctrl+D |
| Print. | Ctrl+P |
| Copy an item. | Ctrl+Shift+Y |
| Move an item. | Ctrl+Shift+V |
| Check names. | Ctrl+K |
| Check spelling. | F7 |
| Flag for follow-up. | Ctrl+Shift+G |
| Forward. | Ctrl+F |
| Send or post or invite all. | Alt+S |
| Enable editing in a field (except in Mail or Icon view). | F2 |
| Left align text. | Ctrl+L |
| Center text. | Ctrl+E |
| Right align text. | Ctrl+R |
Mail
| TO DO THIS | PRESS |
|---|---|
| Switch to Inbox. | Ctrl+Shift+I |
| Switch to Outbox. | Ctrl+Shift+O |
| Choose the account from which to send a message. | Ctrl+Tab (with focus on the To box), and then Tab to theAccounts button |
| Check names. | Ctrl+K |
| Send. | Alt+S |
| Reply to a message. | Ctrl+R |
| Reply all to a message. | Ctrl+Shift+R |
| Reply with meeting request. | Ctrl+Alt+R |
| Forward a message. | Ctrl+F |
| Mark a message as not junk. | Ctrl+ Alt+J |
| Display blocked external content (in a message). | Ctrl+Shift+I |
| Post to a folder. | Ctrl+ Shift+S |
| Apply Normal style. | Ctrl+Shift+N |
| Check for new messages. | Ctrl+M or F9 |
| Go to the previous message. | Up Arrow |
| Go to the next message. | Down Arrow |
| Create a message (when in Mail). | Ctrl+N |
| Create a message (from any Outlook view). | Ctrl+Shift+M |
| Open a received message. | Ctrl+O |
| Delete and Ignore a Conversation. | Ctrl+Shift+D |
| Open the Address Book. | Ctrl+Shift+B |
| Add a Quick Flag to an unopened message. | Insert |
| Display the Flag for Follow Up dialog box. | Ctrl+Shift+G |
| Mark as read. | Ctrl+Q |
| Mark as unread. | Ctrl+U |
| Open the Mail Tip in the selected message. | Ctrl+Shift+W |
| Find or replace. | F4 |
| Find next. | Shift+F4 |
| Send. | Ctrl+Enter |
| Print. | Ctrl+P |
| Forward. | Ctrl+F |
| Forward as attachment. | Ctrl+Alt+F |
| Show the properties for the selected item. | Alt+Enter |
| Create a multimedia message | Ctrl+Shift+U |
| Mark for Download. | Ctrl+Alt+M |
| Clear Mark for Download. | Ctrl+Alt+U |
| Display Send/Receive progress. | Ctrl+B (when a Send/Receive is in progress) |
Calendar
| TO DO THIS | PRESS |
|---|---|
| Create an appointment (when in Calendar). | Ctrl+N |
| Create an appointment (in any Outlook view). | Ctrl+Shift+A |
| Create a meeting request. | Ctrl+Shift+Q |
| Forward an appointment or meeting. | Ctrl+F |
| Reply to a meeting request with a message. | Ctrl+R |
| Reply All to a meeting request with a message. | Ctrl+Shift+R |
| Show 1 day in the calendar. | Alt+1 |
| Show 2 days in the calendar. | Alt+2 |
| Show 3 days in the calendar. | Alt+3 |
| Show 4 days in the calendar. | Alt+4 |
| Show 5 days in the calendar. | Alt+5 |
| Show 6 days in the calendar. | Alt+6 |
| Show 7 days in the calendar. | Alt+7 |
| Show 8 days in the calendar. | Alt+8 |
| Show 9 days in the calendar. | Alt+9 |
| Show 10 days in the calendar. | Alt+0 |
| Go to a date. | Ctrl+G |
| Switch to Month view. | Alt+= or Ctrl+Alt+4 |
| Go to the next day. | Ctrl+Right Arrow |
| Go to the next week. | Alt+Down Arrow |
| Go to the next month. | Alt+Page Down |
| Go to the previous day. | Ctrl+Left Arrow |
| Go to the previous week. | Alt+Up Arrow |
| Go to the previous month. | Alt+Page Up |
| Go to the start of the week. | Alt+Home |
| Go to the end of the week. | Alt+End |
| Switch to Full Week view. | Alt+Minus Sign or Ctrl+Alt+3 |
| Switch to Work Week view. | Ctrl+Alt+2 |
| Go to previous appointment. | Ctrl+Comma or Ctrl+Shift+Comma |
| Go to next appointment. | Ctrl+Period or Ctrl+Shift+Period |
| Set up recurrence for an open appointment or meeting. | Ctrl+G |
See also under Views, Calendar Day/Week/Month view, and Date Navigator.
People
| TO DO THIS | PRESS |
|---|---|
| Dial a new call. | Ctrl+Shift+D |
| Find a contact or other item (Search). | F3 or Ctrl+E |
| Enter a name in the Search Address Books box. | F11 |
| In Table or List view of contacts, go to first contact that starts with a specific letter. | Shift+letter |
| Select all contacts. | Ctrl+A |
| Create a message with selected contact as subject. | Ctrl+F |
| Create a contact (when in Contacts). | Ctrl+N |
| Create a contact (from any Outlook view). | Ctrl+Shift+C |
| Open a contact form for the selected contact. | Ctrl+O |
| Create a contact group. | Ctrl+Shift+L |
| Print. | Ctrl+P |
| Update a list of contact group members. | F5 |
| Go to a different folder. | Ctrl+Y |
| Open the Address Book. | Ctrl+Shift+B |
| Use Advanced Find. | Ctrl+Shift+F |
| In an open contact, open the next contact listed. | Ctrl+Shift+Period |
| Find a contact. | F11 |
| Close a contact. | ESC |
| Send a fax to the selected contact. | Ctrl+Shift+X |
| Open the Check Address dialog box. | Alt+D |
| In a contact form, under Internet, display the Email 1 information. | Alt+Shift+1 |
| In a contact form, under Internet, display the Email 2 information. | Alt+Shift+2 |
| In a contact form, under Internet, display the Email 3 information. | Alt+Shift+3 |
In the Electronic Business Cards dialog box
| TO DO THIS | PRESS |
|---|---|
| Open the Add list. | Alt+A |
| Select text in Label box when the field with a label assigned is selected. | Alt+B |
| Open the Add Card Picture dialog box. | Alt+C |
| Place cursor at beginning of Edit box. | Alt+E |
| Select the Fields box. | Alt+F |
| Select the Image Align drop-down list. | Alt+G |
| Select color palette for background. | Alt+K, then Enter |
| Select Layout drop-down list. | Alt+L |
| Remove a selected field from the Fields box. | Alt+R |
Tasks
| TO DO THIS | PRESS |
|---|---|
| Accept a task request. | Alt+C |
| Decline a task request. | Alt+D |
| Find a task or other item. | Ctrl+E |
| Open the Go to Folder dialog box. | Ctrl+Y |
| Create a task (when in Tasks). | Ctrl+N |
| Create a task (from any Outlook view). | Ctrl+Shift+K |
| Open selected item. | Ctrl+O |
| Print selected item. | Ctrl+P |
| Select all items. | Ctrl+A |
| Delete selected item. | Ctrl+D |
| Forward a task as an attachment. | Ctrl+F |
| Create a task request. | Ctrl+Shift+Alt+U |
| Switch between the Folder Pane, Tasks list, and To-Do Bar. | Tab or Shift+Tab |
| Undo last action. | Ctrl+Z |
| Flag an item or mark complete. | Insert |
Format text
| TO DO THIS | PRESS |
|---|---|
| Display the Format menu. | Alt+O |
| Display the Font dialog box. | Ctrl+Shift+P |
| Switch case (with text selected). | Shift+F3 |
| Format letters as small capitals. | Ctrl+Shift+K |
| Make letters bold. | Ctrl+B |
| Add bullets. | Ctrl+Shift+L |
| Make letters italic. | Ctrl+I |
| Increase indent. | Ctrl+T |
| Decrease indent. | Ctrl+Shift+T |
| Left align. | Ctrl+L |
| Center. | Ctrl+E |
| Underline. | Ctrl+U |
| Increase font size. | Ctrl+] or Ctrl+Shift+> |
| Decrease font size. | Ctrl+[ or Ctrl+Shift+< |
| Cut. | Ctrl+X or Shift+Delete |
| Copy. |
Ctrl+C or Ctrl+Insert
NOTE Ctrl+Insert is not available in the Reading Pane.
|
| Paste. | Ctrl+V or Shift+Insert |
| Clear formatting. | Ctrl+Shift+Z or Ctrl+Spacebar |
| Delete the next word. | Ctrl+Shift+H |
| Stretch a paragraph to fit between the margins. | Ctrl+Shift+J |
| Apply styles. | Ctrl+Shift+S |
| Create a hanging indent. | Ctrl+T |
| Insert a hyperlink. | Ctrl+K |
| Left align a paragraph. | Ctrl+L |
| Right align a paragraph. | Ctrl+R |
| Reduce a hanging indent. | Ctrl+Shift+T |
| Remove paragraph formatting. | Ctrl+Q |
Add web information to items
| TO DO THIS | PRESS |
|---|---|
| Edit a URL in the body of an item. | Hold down Ctrl and click the mouse button. |
| Insert a hyperlink. | Ctrl+K |
Printing
| TO DO THIS | PRESS |
|---|---|
| Open Print tab in Backstage view. | Press Alt+F, and then press P |
| To print an item from an open window. | Alt+F, press P, and then press F and press 1 |
| Open Page Setup from Print Preview. | Alt+S or Alt+U |
| To select a printer from Print Preview. | Alt+F, press P, and then press I |
| To Define Print Styles. | Alt+F, press P, and then press L |
| To open Print Options. | Alt+F, press P, and then press R |
Send/Receive
| TO DO THIS | PRESS |
|---|---|
| Start a send/receive for all defined Send/Receive groups with Include this group in Send/Receive (F9) selected. This can include headers, full items, specified folders, items less than a specific size, or any combination that you define. | F9 |
| Start a send/receive for the current folder, retrieving full items (header, item, and any attachments). | Shift+F9 |
| Start a send/receive. | Ctrl+M |
| Define Send/Receive groups. | Ctrl+Alt+S |
Visual Basic Editor
| TO DO THIS | PRESS |
|---|---|
| Open Visual Basic Editor. | Alt+F11 |
Macros
| TO DO THIS | PRESS |
|---|---|
| Play macro. | Alt+F8 |
Forms
| TO DO THIS | PRESS |
|---|---|
| Create an Office InfoPath form. | Click in an InfoPath folder, and then Ctrl+N. |
| Choose a Microsoft InfoPath form. | Ctrl+Shift+Alt+T |
Views
Table view
| TO DO THIS | PRESS |
|---|---|
| Open an item. | Enter |
| Select all items. | Ctrl+A |
| Go to the item at the bottom of the screen. | Page Down |
| Go to the item at the top of the screen. | Page Up |
| Extend or reduce the selected items by one item. | Shift+Up Arrow or Shift+Down Arrow, respectively |
| Go to the next or previous item without extending the selection. | Ctrl+Up Arrow or Ctrl+Down Arrow, respectively |
| Select or cancel selection of the active item. | Ctrl+Spacebar |
With a group selected
| TO DO THIS | PRESS |
|---|---|
| Expand a single selected group. | Right Arrow |
| Collapse a single selected group. | Left Arrow |
| Select the previous group. | Up Arrow |
| Select the next group. | Down Arrow |
| Select the first group. | Home |
| Select the last group. | End |
| Select the first item on screen in an expanded group or the first item off screen to the right. | Right Arrow |
Calendar Day/Week/Month view
| TO DO THIS | PRESS |
|---|---|
| View from 1 through 9 days. | Alt+key for number of days |
| View 10 days. | Alt+0 (zero) |
| Switch to weeks. | Alt+Minus Sign |
| Switch to months. | Alt+= |
| Move between Calendar, TaskPad, and the Folder List. | Ctrl+Tab or F6 |
| Select the previous appointment. | Shift+Tab |
| Go to the previous day. | Left Arrow |
| Go to the next day. | Right Arrow |
| Go to the same day in the next week. | Alt+Down Arrow |
| Go to the same day in the previous week. | Alt+Up Arrow |
Day view
| TO DO THIS | PRESS |
|---|---|
| Select the time that begins your work day. | HOME |
| Select the time that ends your work day. | END |
| Select the previous block of time. | Up Arrow |
| Select the next block of time. | Down Arrow |
| Select the block of time at the top of the screen. | Page Up |
| Select the block of time at the bottom of the screen. | Page Down |
| Extend or reduce the selected time. | Shift+Up Arrow or Shift+Down Arrow, respectively |
| Move an appointment up or down. | With the cursor in the appointment, Alt+Up Arrow or Alt+Down Arrow, respectively |
| Change an appointment's start or end time. | With the cursor in the appointment, Alt+Shift+Up Arrow or Alt+Shift+Down Arrow, respectively |
| Move selected item to the same day in the next week. | Alt+Down Arrow |
| Move selected item to the same day in the previous week. | Alt+Up Arrow |
Week view
| TO DO THIS | PRESS |
|---|---|
| Go to the start of work hours for the selected day. | Home |
| Go to the end of work hours for the selected day. | End |
| Go up one page view in the selected day. | Page Up |
| Go down one page view in the selected day. | Page Down |
| Change the duration of the selected block of time. | Shift+Left Arrow, Shift+Right Arrow, Shift+Up Arrow, or Shift+Down Arrow; or Shift+Home or Shift+End |
Subscribe to:
Posts (Atom)